009: Avocado


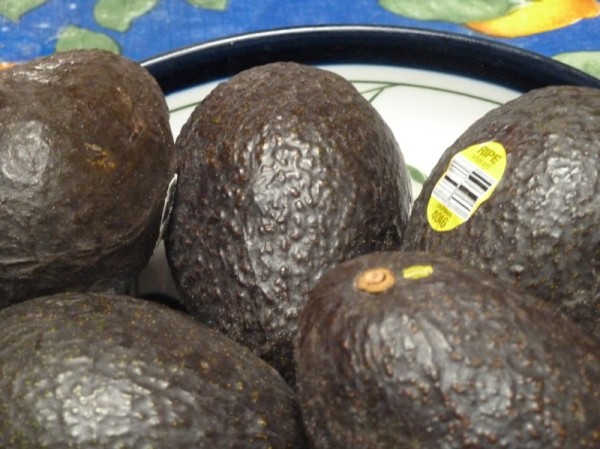
Alright everybody, avocados. Don’t nobody not like an avocado. It’s one of the greatest foods, ever. I was worried about doing avocados because they’re just so perfect on their own, raw. I didn’t want to cook them, and I didn’t want them to be just a plus-one, which is really what they excel at. With that in mind, I developed a pretty cool menu, one that essentially stuck to those two guidelines.
I work at a breakfast and lunch place, and cooking there has given me a knee-jerk scoff response to people who order bacon. People just can’t get enough of bacon. I’ll have bacon myself sometimes, on lunch breaks, but still look down on tickets that ask for bacon sides, or BLTs, bacon with eggs, bacon paninis. Avocado is just about as popular, but I have no such reaction to orders for avocado, because I understand. It’s the boss.

Menu (Serves 5)
Avocado and Ruby Grapefruit Salad with Guacamole Empanada
Portobello-Swiss Burger on Avocado Bun
Chocolate Banana Avocado Pudding

Guacamole Empanada

-2 avocados
-1 red onion
-1 lime
-1.5c flour
-1/2t salt
-1 egg, beaten
-1/2t vinegar
-1/4c water
-1.5T butter/shortening

Dice the red onion fairly small. Mix it in a bowl with the avocados, mashed, and the juice of the lime. You can also add jalapeno, cilantro, and/or tomato, but I kept it really simple for this. Season with salt and pepper to taste.
Mix the water, egg, and vinegar in a small bowl or measuring cup. Mix together the flour and salt, then cut the butter into it [I never bake, so I had no idea how to do this, really. I ended up just squidging the butter and flour together, which worked perfectly fine. Tips on doing it properly here]. You should have  a loose, kind of sawdust-y mixture. Dig a well into the mound, then pour in the egg mixture and incorporate it into the flour. When you have a ball of dough, pour it out onto a floured surface and knead it, getting all the leftover dough flakes into the smooth dough ball. Wrap up the dough and chill it for at least an hour.
Once the dough has chilled, roll it out thin over some flour. With a tupperware or lid, cut uniform disks of dough. I ended up with just enough for five decently-sized empanadas.
Glop a nice big spoonful or two of guacamole onto one half of each disk, leaving ample space for the edges to seal. Press the edge shut, and crimp with the tines of a fork.
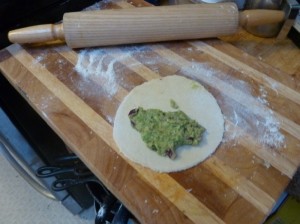
You can make these ahead and put them in the fridge if you like, but make sure there’s a lot of flour on them. I had several close calls getting them unstuck from the sheet I had them on when it came time to fry them.
Heat 1.5-2 inches of oil in a heavy pan. Drop in a little crumb of something to test the oil. Just look for a good amount of bubbles. When the oil looks ready, slide the empanadas in with a spatula. You can fry more than one at a time, as long as there’s enough room for them not to crowd. The amount of oil I specified should be enough to submerge an empanada at least half-way. Turn them with a long pair of tongs. Watch them carefully, as they can burn easily. Remove them to a draining rack to cool. Mine turned out surprisingly un-greasy, but it’s still a good idea.

Avocado and Ruby Grapefruit Salad
I basically followed this recipe exactly.

-1T dijon mustard
-1/4 cup lemon juice
-1.5t salt
-3/4t pepper
-1/2c olive oil
-1T honey
-3 avocado
-2 ruby grapefruit

Whisk all the ingredients except for the fruit together in a bowl. Halve the avocados. Lay them flesh-down on a surface, get your fingers underneath the skin, and pull it away. Put the skinned halves into the dressing, and leave them there until dinner is being served, turning occasionally. Peel the grapefruit, taking care to keep the slices intact. Remove the white pith as thoroughly as possible.
To serve, lay four slices of grapefruit at the top of the plate, slice each avocado half and place in the middle, then place the empanada at the bottom. Drizzle the grapefruit with the dressing.

Avocado Buns

-2c flour
-1t yeast
-2T sugar
-1t salt
-1 avocado
-1/2c warm water
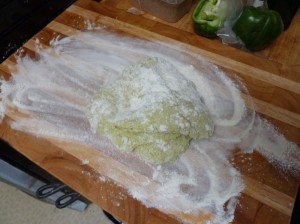
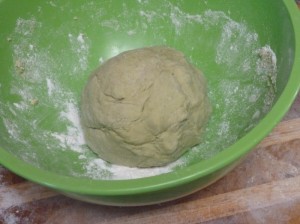
Mix the flour, yeast, sugar, salt, and mashed avocado together in a bowl. The avocado will have enough moisture in it to form a loose dough, but there’ll be a ton of flour and stuff left over in the bowl. Use the water to incorporate this. Half a cup is probably enough water, but use more if you need. You’ll end up with a pale green mass of dough. Put it on a floured surface, and start kneading! I had never really done this, either. Basically, just pull one end of the dough away from the rest, fold it over, press it in, then repeat. Do this for a few minutes, refreshing the flour on the board and dough [if this is totally wrong, please tell me!! I want to get good at making bread].

I don’t know how much of a difference you can really see, but this is pre- and post-kneading. As you knead, though, you will notice the dough kind of coming together, getting more elastic. When you’re done kneading, put the dough in a bowl and cover it with a cloth. Let it sit for at least an hour, preferably longer. The recipe says to wait for it to double in size. In any case, once you’re done with checking on it and seeing how much bigger it is, pull it out, separate it into five pieces (I made a log and cut it), and shape them. This dough puffs up pretty good. The test batch I made, shaped into rounded lumps, turned out way too dinner-roll-y, so for the dinner batch I made thick disks, which worked really well.  Cover the shaped rolls with the cloth, and let them rise for at least half an hour.
Heat the oven to 350. Try to get the rolls done around the time you’re serving dinner, as they’re much better fresh. Bake them 20-25 minutes. When they start to brown on top, they’re probably ready.
Portobello-Swiss Burgers and Avocado Aioli
-5 portobello caps
-4 avocados
-swiss cheese
-1/4c sour cream
-2 cloves garlic
-1T lemon juice
-1T lime juice
-1/2 jalapeno
-1/2 shallot
Chop the garlic, jalapeno, and shallot. Put them in a small food processor with one and a half avocados, the lemon and lime juice, and the sour cream. Blitz. Season with salt and pepper.
Heat a grill (or just a pan). Remove the stems, and oil the mushrooms on both sides. Just throw them on there and let them cook down to a juicy mushroom patty.
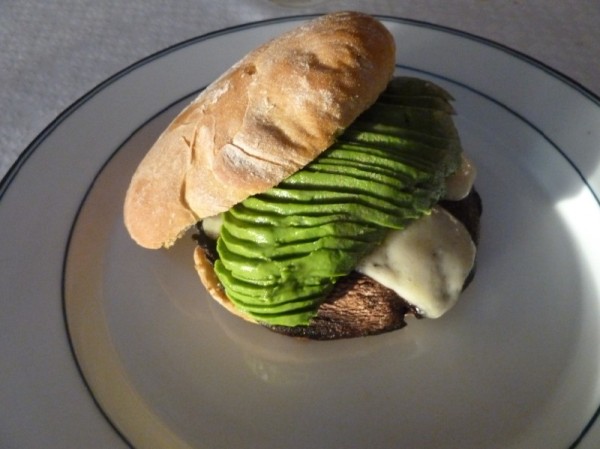
Skin the remaining avocados with the same method as the salad. Slice very thin. Avocados have a great texture for cutting them super thin while keeping them in essentially the same shape they started in.
Turn on your oven’s broiler. Cut the avocado rolls in half, setting aside the top. Spread the bottom half with aioli, top with a mushroom, and a couple slices of swiss cheese. Arrange these on a baking sheet, and place them under the broiler to melt the cheese. When that’s done, pull them out.
Top each burger with a sliced avocado half, and the top bun.
-2 avocados
-3 bananas
-1t vanilla
-1t cinnamon
-3T unsweetened cocoa powder
-3 strawberries
Blend the avocado and banana in a food processor. Add the vanilla, cinnamon, and cocoa powder, and blend again. Distribute to dishes, and garnish with strawberry.
Report
Another really well-done menu. As I said, I was unsure about this one, and worried I would end up falling back on “put avocado on top.” And in fact I did, but I surrounded it with enough creative elements that I felt okay about it. And everything worked! The empanada turned out great, and the guacamole that I wasn’t very fond of when I made it ended up being a great filling anyway. It was perfectly warmed by the frying, and the empanada wrap was crispy on the outside and doughy and chewy on the inside. I used half-sheets of wax paper to wrap them, as I was concerned about grease. It turned out being unnecessary, but it gave them a really fun street food look.
The dressing-marinated avocados were delicious. The grapefruit I wasn’t as crazy about. Everyone else seemed to like it, but I found it too bitter. I would rather have used pomelo or similar tart citrus. It was still good, though, and the dressing went well with it.
I loved the avocado rolls. They’re actually just “decent,” taken in the context of bread as a food group, but the novelty of them was endearing, and they really worked with the portobello burger. No real comments on the portobello, just that you should really be substituting portobellos for meat more often than you probably do. I didn’t really notice the flavor of the aioli, probably because it was too similar to straight avocado, which was also in the sandwich. However, I have no idea what the sandwich would have been without it; maybe it was an integral part?  The only big thing I would change about the burger is add tomato. It was noticeably better with ketchup, and ketchup is great but not really a “good chef” thing to have in a recipe. I think it was mainly missing that tomato flavor and moisture on the top.
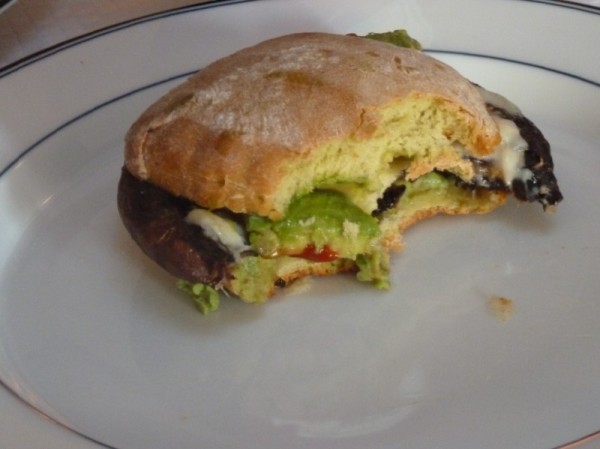
The buns, true to their dough’s color, are a pale green inside. Note the ketchup.
The pudding, if you couldn’t tell from the recipe, was mega easy. I still managed to mess it up and used a tablespoon instead of a teaspoon of cinnamon, so had to cut it with more vanilla and the third banana, which I think is a good addition and so modified the recipe. It’s very nice, and tasted distinctly of avocado. The site I linked for the recipe also has a chocolate-less variation, with just banana and avocado, which I think I should have used instead. I tasted the pudding before adding the second round of ingredients, and it was pretty tasty. I think it would have been more interesting to just serve that. The chocolate pudding was good, though, so whatever!
I should have made the empanadas smaller. The first course, with the salad and empanada, was a substantial meal on its own. I had planned to serve two little empanadas per person, but I kept visualizing them and thinking “well I could barely fit any filling in there” and sizing them up until I got the rather large ones I ended up making. I was also dissatisfied with plating in several areas. The burger, for one thing, had no plating to speak of. I spent half the day watching The Dark Knight Rises instead of thinking about how to pretty it up. Another problem was that each time I served “whole” avocado, I cut and spread it in the exact same fashion, only with thinner slices on the burger. There’s really no reason I should have cut it that way for the salad, either. In retrospect, I think I would quarter each half for the salad to pair them one-to-one with the grapefruit (or whatever more palatable fruit I choose).
Overall, this was one of the better menus. This and corn are tied for most consistent, quality-wise, and this one definitely wins out in terms of creativity. It also showcased the ingredient well, while being unafraid to let another ingredient into the spotlight. Avocado shone through in every dish, and served a different purpose in each. I’m pretty proud of this one, and it was actually one of the simplest menus I’ve made! I just don’t know how much credit I owe to avocados.
PS Wait Guys: I almost forgot to pass on this cool thing I learned from Wikipedia! The structure of avocados is basically like a cherry, a seed surrounded by fruity meat. And the idea with cherries is that animals will eat them and then the seeds will pass through their digestive system and end up somewhere else, spreading the plant. But avocados are huge! With huge seeds. So what evolutionary biologists theorize is that avocados co-evolved with megafauna such as giant sloths, serving as an exclusive food source and relying on those animals for propagating the plant! And…I guess humans discovered avocados around the same time they killed all the giant sloths, so avocados survived?
Next Week: Peach and Nectarine

008: Peppers


Bell peppers! Jalapenos too but this menu is about bell peppers. I haven’t got much experience with bell peppers. Mainly I just stir fry them, like I do with most vegetables, I’m realizing. I don’t even like them all that much in salad or as crudites. They do have a particular flavor though, one that’s easy to enjoy or learn to enjoy.
Something I learned about bell peppers, which seems so obvious now that I know it, is that the different colors represent different ripenesses of the same fruit. Something I learned right now, while fact checking, is that the ripeness thing applies specifically to red and green peppers, whereas yellow, orange and purple peppers are different cultivars.
I didn’t find any purple peppers, but you know I would have used them!

Menu (Serves 5)
Bell Pepper and Orzo Salad-Stuffed Marinated Pepper
Yellow Pepper Soup with Sweet Pepper Poppers
Red Pepper Tart
Jalapeno Ice Cream

Jalapeno Ice Cream

-1 1/2c cream
-1 1/2c whole milk
-3/4c sugar
-1t salt
-3 jalapenos
-1 vanilla bean or 2T vanilla extract
-1/4c molasses
-3T cornstarch

Ice cream first, as always. Do this the day before, if possible. I cut it a little close and ended up with the perfect texture, but that’s a bit risky. You’ll be chilling the mixture for 3 to 4 hours, then churning for at least half an hour, then chilling the ice cream for at least 3 hours. And, depending on what kind of ice cream maker you have, you might need to chill the maker bowl for a day or so beforehand.
So, stir together the cream, milk, sugar and salt in a large saucepan. Split the jalapenos and vanilla bean if you have one, and add all of it to the cream mixture with the molasses. Heat it on medium until bubbles start forming. Kill the heat as soon as you see real bubbles (not just from stirring). Let the mixture cool to room temperature.

Strain the peppers and vanilla out. Remove 1/2c of the cream to a little bowl, and mix it with the cornstarch to make a slurry. Put the pot back on the heat, and once you’re satisfied there’s no lumps in the slurry, stir it in. If you want the ice cream to have a fun color, like green or red, this is when you add the food coloring. Stir the ice cream in one direction constantly, until it thickens and will coat the back of a spoon (I often feel like that’s a really vague milestone, but in this case it will noticeably coat the back of a spoon). Pour the mixture into a bowl, covering with plastic wrap touched to the surface, and put it in the fridge for 3 to 4 hours.
After that time, pour the mixture into your assembled ice cream maker. Assuming you can, watch it spin and monitor the consistency of the ice cream. It’ll become a lot more solid, with big empty spaces trailing the agitator and the ice cream itself piling up on the leading side. When it reaches this point, pour it into a container to go in the freezer. Leave it in for 3 to 4 hours, again. In the stages leading up to solidification, you can add mix-ins (for example I added a small amount of chocolate chips).

Bell Pepper and Orzo Salad-Stuffed Marinated Pepper

-3 red bell peppers (evenly shaped, with straight-ish walls)
-1/2c orzo
-1 orange bell pepper
-1 green bell pepper
-1 red onion
-1 persian cucumber
-1/4c lemon juice
-2T lemon juice
-1/2c white vinegar
-1/4c olive oil
-2 1/2t olive oil
-3 clove garlic
-2t red wine vinegar
-1/2t salt
-1/4t pepper
-1t balsamic vinegar

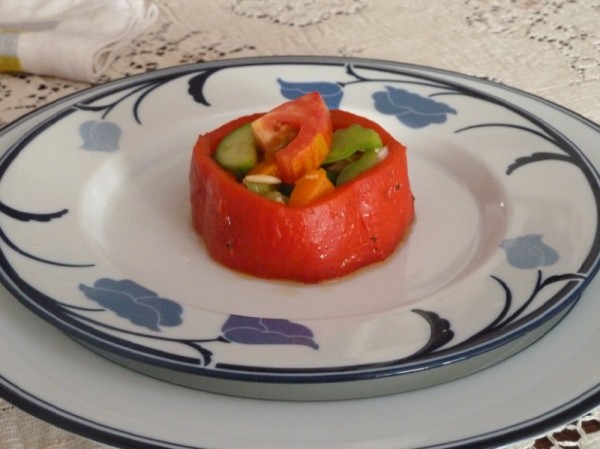
So first, you have to roast the red peppers. The recipe I linked has a method that employs your oven’s broiler, but for this recipe the peppers have to be whole. Just throw the pepper on there, maybe into spaces in the grill so the flames actually get on it. It’s kinda fun, though it needs fairly constant attention. Keep turning it so that the skin on each pepper gets blackened or at least “touched.” Let the peppers cool down a bit in a bowl, covering it so the skin gets looser. Once they’re cool enough to handle, pull the skin off of them. It’s kind of a pain, and there’ll be parts that stick too well, but it should be easy enough to get the skin off. Cut the tops and bottoms off the peppers, pull out the core, then cut each in half to make two pepper rings. Mix the 1/4 cup lemon juice, 1/2 cup vinegar, 1/4 cup olive oil, 1 clove of minced garlic, and a bit of salt in a measuring cup. Pour this mixture over the rings in the bowl, and let it marinate until you’re preparing to serve dinner.

Chop the orange and green peppers, and red onion to a small dice. Cut the cucumber in half, then into thin half-moons. Boil a cup or two of water, and cook the orzo. Mix all the ingredients in a bowl. Mix the dressing: 2T lemon juice, 2 1/2t olive oil, 2 cloves of minced garlic, 2t red wine vinegar, 1t balsamic, 1/2t salt, 1/4t pepper. Mix this into the salad.
When you’re ready to serve, place a ring on a small plate, then fill with salad. I garnished with a tomato slice, but whatever!

Yellow Pepper Soup with Sweet Pepper Poppers
-5 yellow bell peppers
-2 Yukon gold potatoes
-1 onion
-1 leek
-3T butter
-5 cups chicken stock
-parsley
-10 mini peppers: 5 red, 5 yellow
-8 oz cream cheese
-1 1/2T capers

Cut the yellow peppers in half and remove the cores. Place them face down on a baking tray and drizzle with olive oil. Set the oven to broil, and put the peppers in. It’ll take less than ten minutes; just keep an eye on the peppers, monitoring their skin. You’re going to be pulling the skin off again, so aim for the same thing as with the red. You can use the burner method for this if you want, but it’s a lot simpler to use the broiler.

Again, let them cool, and cover them if you want to loosen the skin more. Pull the skin off. Chop the onion and leek. Don’t worry about getting them even or anything. Cut the potatoes into chunks. Cut the peppers roughly. Melt the butter in a dutch oven or heavy pot. Saute the onion and leek with some salt, until soft. Add the potatoes, peppers, and broth. Simmer the soup until the potatoes are soft. Turn off the heat, and let the soup cool off a bit. The recipe says room temperature, but that’s probably not necessary. Pour the soup into a blender and puree it. Put it back in the pot, over low heat to keep it warm.

Preheat the oven to 350. Cut the tops off the mini peppers, and cut out the insides. Keep the shell of them intact! Mix together the cream cheese and capers. Fill the peppers, pushing the cheese down to fill the whole thing. Fill them straight to the top, and re-cap them with the tops you cut off. They probably won’t stay on, but maybe they will! Put a sheet of parchment paper on a baking tray, then lay the peppers out on it. Bake for 20-25 minutes.

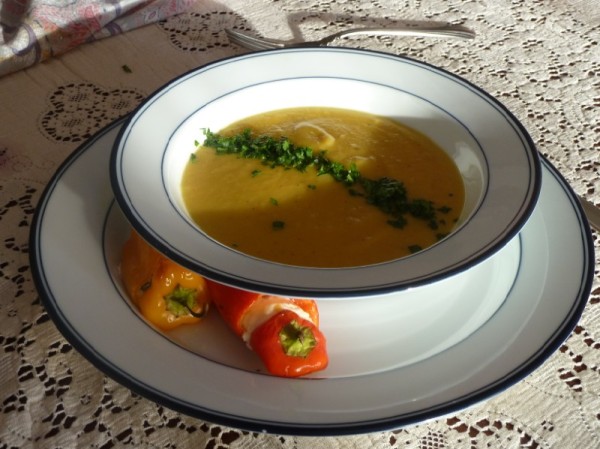
Chop the parsley fine. Spoon out the soup, garnish with chopped parsley, and serve alongside a red and a yellow pepper.

Red Pepper Tart

-3 red bell peppers
-5T butter
-salt
-3T sugar
-8 phyllo sheets

First, prepare the pastry. I used phyllo dough, which I’ve never used on my own. Preheat the oven to 450. Melt 2T of the butter in the microwave. Take individual sheets of dough and lay them into a tart pan. Press the dough into the sides and “corners” of the pan, brush with melted butter, then lay down another sheet. I ended up with a ton of excess dough, so I just cut it away from the pan.
Cut the peppers into hearty chunks. Melt the remaining 3T of butter in a large pan, then saute the peppers in it. Once they’re nicely softened, push them to the sides of the pan, making a hole in the center. Drop the sugar in there. Let it cook for a bit, then stir it up with the peppers. It’ll caramelize as you cook. When it coats the peppers to your liking, take it off the heat. Pour the mixture into the tart. Bake for 10 minutes.

Report

Pretty dang good! Some real standouts, and nothing went really wrong. I finally got ice cream right, my sweet pepper poppers worked perfectly, the soup was pretty good, and the tart, although it looked kind of plain, was delicious. I was least pleased with the salad, but it went over alright as well.

When I made the salad I chopped the vegetables a bit too big. I did this on purpose to make them easier to eat with a fork, but when the salad was actually served we realized it would work better with a spoon. So, small dice. The orzo was also a little thin when I made it, so I guessed at a good amount when I wrote out the recipe. Aim for half orzo, half peppers. I also felt the dressing was a little lame. It was passable, but not great or memorable. The marinated pepper was good. I like the presentation a lot on this one.
The soup was nice. I didn’t have enough stock, like at all, so it came out thicker than I think it was supposed to. But, I like thick. It had a delicate flavor, but it was distinctly sweet pepper. Though I would have liked a stronger taste, I’m glad the ingredient came through like it did. It was almost vegetarian, too. I barely had a cup and a half of chicken stock, and the soup still came out. It could easily be subbed by vegetable broth, or even just water. The poppers were delicious. Super easy, and a great choice for a general appetizer or hors d’oeurve. My sister can’t stand eating whole capers, but they went really well with the cheese and peppers. 
The tart came out alright. The crust was way too thin on the bottom; I followed the directions, not sure if it was supposed to be that way or what. The pepper filling was great. However, it didn’t fit very well with the tart. There was nothing holding it on the crust, and what should have been the most substantial part of the meal was one of the lightest. If I made this again, I would maybe use a custard tart shell for a thicker crust, and definitely goat cheese underneath, to hold the peppers better and to make the tart heavier. Having it so light didn’t sit well with me.
The ice cream. The ice cream! The ice cream was incredible. Molasses gave it an amazing butterscotch flavor. The jalapenos were just steeped in the cream, but they released a ton of oils or whatever. The first bite of ice cream is old-timey butterscotch heaven, and then the jalapeno’s heat comes in and slaps your face and doesn’t stop slapping. Slap slap slap. It’s really tasty, and really fun, and like most ice cream, really easy. Make it.

My sister and her boyfriend wimped out and gave me their leftovers.
So, this menu came out pretty well. Like I said, no flops, and a couple excellent dishes. Another thing to note is that I probably made the greatest by-volume use of the ingredient this time. While that’s cool, I feel like the dishes were a little obsessive. I didn’t think enough about what to pair with the peppers, and ended up just pairing them with themselves. I wouldn’t say this about any of the dishes on their own, but as a menu it did feel one-note. My main goal was to avoid making stuffed peppers as the main course, so I guess it counts as a success!

Next Week: Avocado

007: Broccoli

Alright, broccoli isn’t in season. Totally not. I read in at least one place that it was! Anyway, I did broccoli, another great vegetable that a lot of people are unfairly biased against. To be fair, it’s kind of easy to mess up. But! Super healthy, delicious when done right, giant food.

The Menu (Serves 4)

Spicy Broccoli Soup
Broccoli and Snap Pea Salad
Orange-Ginger Short Rib with Roasted Broccoli
Mango Rice Pudding

Mango Rice Pudding
-1T butter
-1/3 cup arborio rice
-1 cup coconut milk
-1/4 cup white sugar
-pinch of salt
-3 cups milk
-1t vanilla extract
-1 egg yolk
-fresh mango

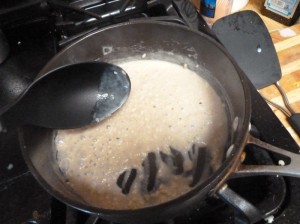
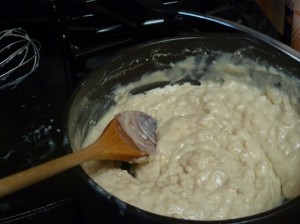
This pudding is made like a risotto, with risotto rice. Heat the coconut milk and milk in a saucepan. Don’t boil it or anything, just get it warm. Melt the butter in a heavy saucepan on medium heat. Pour the rice in, and cook it briefly in the butter (about 45 seconds). Ladle in some of the milk. You’re gonna be stirring a whole lot, so get ready! Stir the rice as it absorbs the milk. When it’s time for more milk, you’ll be able to tell. The mixture will get kind of tight and “dry” in a particular way. Watch the video in the linked recipe for a visual aid. Keep adding milk a little at a time, stirring constantly. At a certain point, you can add milk in larger quantities. Again, you’ll be able to tell. It’s hard to define, but you will.
When you reach the end of the milk, stir in the sugar, and vanilla. Beat the egg yolk with 2T milk, and whisk it into the pudding.

Once it’s cooled a bit, distribute the pudding to four dishes. Cover them in plastic wrap, touching the plastic to the surface to prevent a skin from forming. Put the dishes in the fridge until it’s time for dessert.
Chop up the mango, and put a little handful on top.

Orange-Ginger Short Rib with Roasted Broccoli
-2.5-3 lb short ribs
-2t powdered ginger
-2T canola oil
-1/3 cup fresh orange juice
-1 large onion, diced
-1 large carrot, diced
-1 celery rib, diced
-1/2 cup brown sugar
-1/3 cup balsamic vinegar
-2/3 cup low-sodium soy sauce
-2T chopped fresh ginger
-3 garlic cloves, minced
-2.5 cups low-sodium beef stock
-1/4 cups flour
-1 bay leaf
-Salt and pepper
-1 cup rice
-2 large crowns broccoli
-1 orange, red or yellow bell pepper

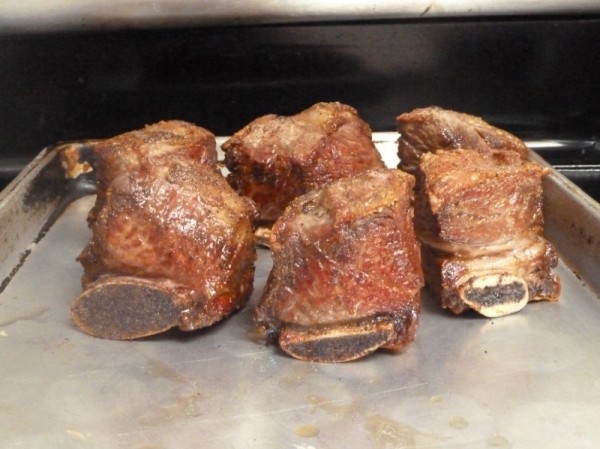
Preheat the oven to 275. Heat the canola oil in a dutch oven or large heavy pot at medium-high heat. Dry the short ribs if there’s any juice or whatever on them, then salt and pepper both sides, and sprinkle with the powdered ginger. Put them in the pot and cook each side 2-3 minutes. When they’re fully browned, pull them out.

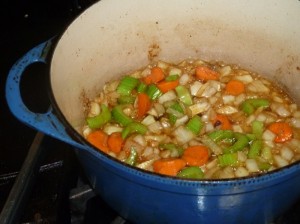
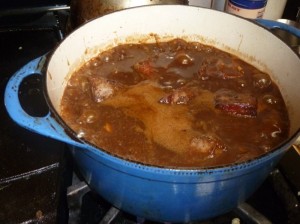
The pot will have a huge amount of rendered beef fat at the bottom. Did you chop up the onion, carrot and celery? Then turn the heat down a little, and pour the vegetables in. While they saute, use a vegetable peeler to remove the skin from the oranges. Add the orange peel, garlic and ginger to the pot. Juice the oranges, mix with the soy sauce and balsamic vinegar, and add to the pot. Dissolve the brown sugar in the pot. Add the stock, the ribs, and a bay leaf.

Cover the pot with a sheet of parchment paper, then with the pot lid. Put it in the oven for 4 hours.
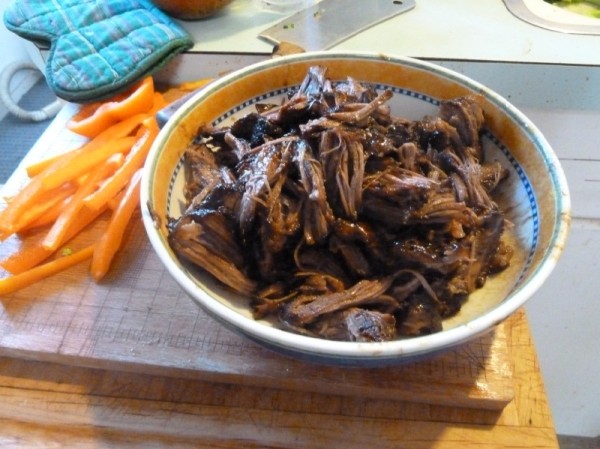
After 4 hours, the meat should be super soft, and pierce with a fork easily. Remove the meat from the braising liquid to a bowl. When the meat’s cooled down, pull it off the bone and into small chunks. Try not to eat too much of it before you serve it, but make sure to eat a little, cause it’s SO GOOD.
Start a pot of rice. Use the amount of water you like, and add a tablespoon or so of the braising liquid. Cook it to the right doneness, then set the pot aside, covered.
Cut the broccoli crowns in half down the stem, making sure each half holds together. Cut the non-flat side away from each half, leaving each piece a quarter inch thick.

Start a large pot of water boiling with a few pinches of salt. When it comes to heat, throw the broccoli in. Let it cook until you can get a fork into the stem without too much difficulty. Try to make sure the treetop parts don’t dissolve; if that starts to happen, take the broccoli out early. Keep the water going.
Preheat the oven to 425. Put the broccoli on a wire rack inside a baking tray. Drizzle with olive oil, and sprinkle with salt and pepper. Bake the broccoli. Since it was cooked most of the way through, this is just for color. Get it nice and browned, and the tips of the broccoli kind of crispy.
Slice the orange pepper into strips. Saute it in a little oil with salt, until softened. If the meat isn’t warm enough, heat it up in the pan.
For each plate, shape a scoop of rice into a narrow bed. Put a handful of the meat on top and press it down. Spread a quarter of the pepper strips over the meat. Top with one of the broccoli slices. Shave some parmesan on top, and drizzle the braising liquid around the rim of the plate.

Broccoli and Snap Pea Salad
-1 head broccoli
-1 cup snap peas
-1/2 cup dried cranberries
-1 large carrot
-1T yogurt
-1T mayonnaise
-juice of 1/2 a lemon

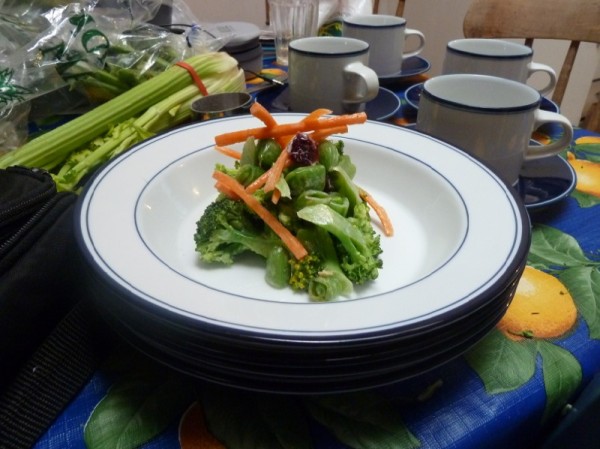
Cut the florets from the head of broccoli. Blanch them in the pot you cooked the broccoli for the ribs in. No more than a minute – just let them get nice and bright green. Pull them out and douse in cold water, so they don’t cook any further. Snap peas have an inedible string that runs the length of them, so pull those out however you can. Cut the peas up into little bites, and saute them until the skin gets some browning on it. Cut the carrot into very thin strips. Mix all the ingredients in a bowl.


Spicy Broccoli Soup
-2 heads broccoli
-2T cream cheese
-1 jalapeno
-dash cayenne
-salt
-pepper

Cut up the broccoli. When you finish blanching the broccoli for the salad, put the broccoli for the soup in. Salt it a bit, and cover. Cook it for a few minutes, until you can pass a knife through easily. Move the broccoli to a blender, and fill the cup half way with water from the pot. Chop up the jalapeno, and add it to the blender. Cover, then pulse a few times before you set it to blend. The cup is pretty full, and could splash out if you just go straight to blend. I added the cream cheese because my soup was too thin, but if your soup is the right consistency, it’s not necessary. Add cayenne, salt and pepper to taste.

Report

Not a great menu. As I said in the intro, it’s not hard to mess up broccoli. There’s a couple fool-proof ways to cook it, but I didn’t use them for the most part.
The soup came out too watery, but after the cream cheese fix, it was really nice. I used Gordon Ramsay’s recipe, plus spicy stuff. I think I added too much water. In the future, I would probably add the water in increments.
The salad was nasty. Mainly the dressing, which was based on real recipes, but nothing I’d ever tried to make. It really didn’t mix well with the not-very-cooked broccoli. I should have made a stir-fry with the salad ingredients. The snap peas were really nice sauteed, and I definitely know how to get broccoli done right in a stir fry.
I suggested boiling the broccoli slices for the ribs longer because what happened to me is that when I tried to bake them, the stems stayed pretty hard, almost inedible. The flowers got nicely crisp in some areas, but basically charcoal in others. I also had to change plans for the dish when the broccoli slices came out too thick. I wanted to make a “sandwich” out of two slices, the peppers, rice and ribs. If the broccoli had worked here, I wouldn’t care so much, but it’s doubly disappointing now.
Somehow, the pudding that was a perfect consistency when I finished cooking it turned pasty and stiff in the fridge. It was tasty, but felt like rubber cement. The mango wasn’t great, either. It was overly firm and didn’t have a strong flavor. My original plan was to puree some mango and put it in the actual pudding, instead of just on top, but it wasn’t the right texture. It was fun to make, though, and I’m going to try again soon, because it had a lot of potential.
The only saving grace were the ribs. The ribs were so, so, so good. I wanted the rib dish to be a sort of Chinese lunch special thing with rice, orange beef, and broccoli, and while the broccoli didn’t cooperate, the rest of it worked pretty well to that end.
Overall, though, this menu was a big failure. The star ingredient really didn’t get its due, and more than half the meal came out badly. And it’s not even the right season! Ball was dropped. I just went looking for another seasonal ingredient, by typing “summer produce” into Google, because that’s how dedicated I am, and found the source of my bad broccoli tip.

Next Week: Peppers

It’s not broccoli season

But I guess I’m doing it anyway. I swear I read it was a summer vegetable!

006: Eggplant


Eggplant! Eggplant! Pow! Eggplant is wonderful. One of my favorite vegetables. Popular in Asian and Mediterranean cuisine,  its main role is for texture. It absorbs flavor well and cooks down to a mush. At the right doneness it holds together but comes apart in the mouth like custard.
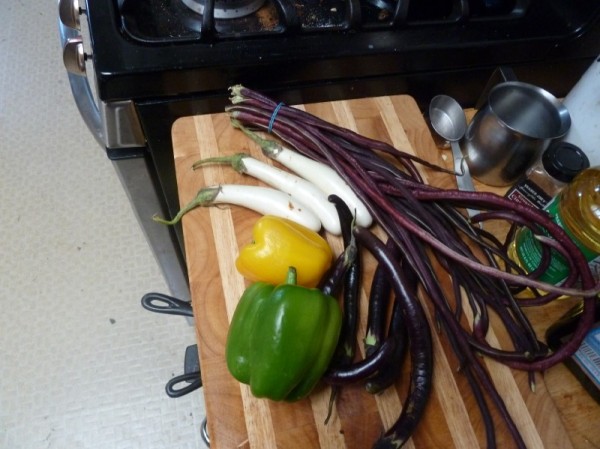
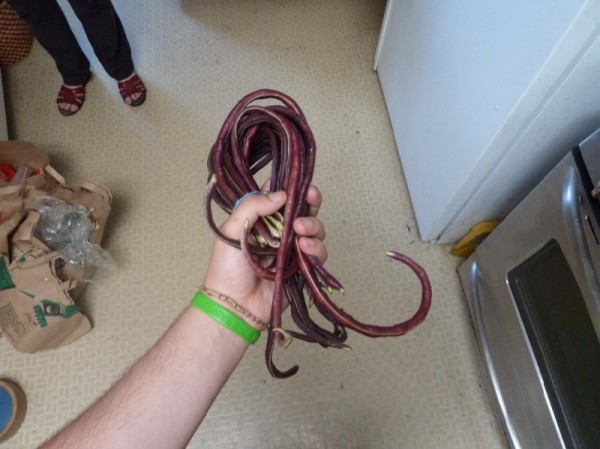
My family took another trip to the Marin Farmer’s Market, and I picked out a bunch of fun types of eggplant and produce for this menu. Chinese eggplant, purple and white finger-shaped eggplant, tiny lime-sized Indian eggplant, a bundle of red yard-long beans, yellow pluots, black mission figs, and star thistle honey.

The Menu (Serves 4)
Grilled Eggplant and Black Mission Fig Salad
Chicken and Eggplant Waffle with Long Bean and Eggplant Stir Fry
Pluot Panna Cotta

I chose to do eggplant this week because of a Facebook conversation I had with my friend Alana. I asked what my next ingredient should be, and she suggested eggplant. I liked the idea and in approval I mistyped “eggoplant!” After a few jokes about eggplant waffles we concluded it would actually be pretty interesting. I wanted to make eggplant waffles as soon as possible, and so here’s eggplant, on week 6 of Butternut.

Pluot Panna Cotta

This is a gelatin dessert, and needs to set. Do this first.

-4 cups heavy cream (or half-and-half)
-1/2 cup sugar
-2t vanilla extract
-2 packets powdered gelatin
-6 tablespoons cold water
-5 pluots
-1.5T powdered sugar

When I made this, I tried to cut the recipe down by 25%, which was a pretty unwieldy fraction and probably hurt how the panna cotta came out.
Heat the cream and sugar in a saucepan, until the sugar has dissolved. Remove from heat and stir in the vanilla. Oil eight ramekins or custard dishes.
In a medium-sized bowl, mix the gelatin and cold water, and let it stand 5 to 10 minutes. Mix the warm cream with the gelatin base, stirring until the gelatin is dissolved. Divide the panna cotta mixture into the eight dishes, and put them in the fridge to set.
10 minutes before dinner, cut two of the pluots into thin slices. Pit the other three, chop them roughly and throw them in a small food processor with a little water and the powdered sugar. Fan out slices on top of each panna cotta. Serve the puree in a dish or pitcher as a sauce.

Grilled Eggplant and Black Mission Fig Salad
4 black mission figs
-6 Indian eggplant
-4 servings arugula/spring mix
-1/4 cup golden raisins
3 oz chevre
-1/4 cup walnut pieces
Dressing
-1.5T white wine vinegar
-1.5T red wine vinegar
-2T Honey
-½c olive oil
-juice of 1/2 lemon
-salt and pepper to taste

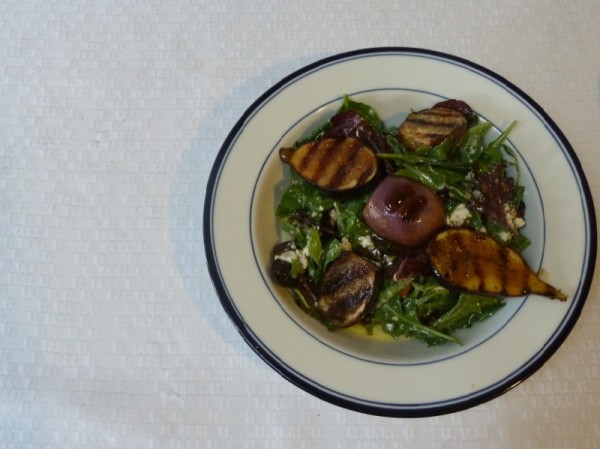
Oil a grill pan or stovetop grill, or fire up the barbecue if you like wasting charcoal. Cut the stems of the eggplant off, and cut them in half. When the grill is hot, place them cut-side down and brush the skin with olive oil and sprinkle with a little salt. Let them cook until brown starts to creep up from the face, then turn them over and let the other side grill a bit. Once the eggplant has nice grill marks and is feeling soft, remove it from the grill and turn off the heat.

Cut the figs lengthwise along the stem, and place them on the grill face-down. Leave them on the grill for a couple minutes; don’t let them cook too long! Just get them hot and charred on the bottom.
Put the arugula, raisins, walnuts, and chevre in a bowl and mix it well. Whisk together the dressing. Dress the salad very lightly. Distribute the salad into four bowls, put three slices of eggplant and two slices of fig on each bowl, and drizzle with more dressing.

Chicken and Eggplant Waffle with Long Bean and Eggplant Stir Fry

Waffle
-1 packet yeast
-1 cup warm water
-1/2t sugar
-3c flour
-1/2t salt
-1/2 pepper
-1 1/4c milk
-1/2c (1 stick) melted butter
-3 eggs, separated
-2t curry powder
-1/2t cumin
-1 medium eggplant
-1/2 pound chicken
-1t soy sauce
-1/4t sesame oil
-2 cloves garlic
-1T ginger

In a small bowl, dissolve the yeast in the warm water. Stir in the half teaspoon of sugar and let it foam up. Mix the flour, salt and pepper in a large bowl. Whisk in the yeast, milk, butter, curry powder, cumin and egg yolks. In yet another bowl, beat the egg whites with a mixer until they fluff up. Fold the egg whites into the batter.

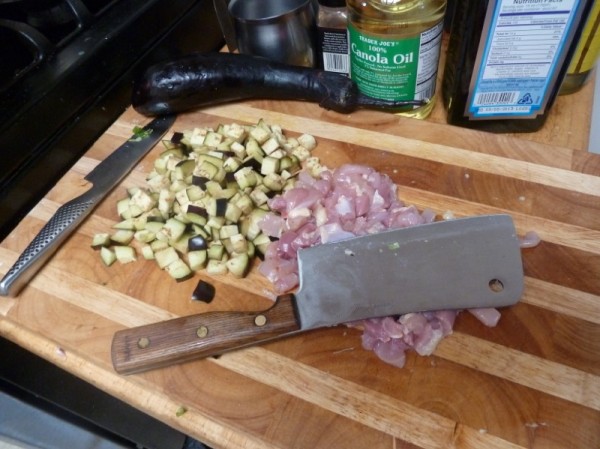
Mince the garlic and ginger, dice the eggplant and chicken. Heat some vegetable oil in a large pan, and throw the garlic and ginger in. When it gets fragrant, put in the chicken. The pieces will be stuck together, but with a little time and nudging, they’ll separate. Add the eggplant. Let it saute for a little bit, then add the soy sauce and sesame oil. Once the eggplant is cooked soft, and the chicken is done (just test a piece- it’ll cook fast.), mix it into the waffle batter.

Stir Fry
-1 bunch yard long beans
-1 small onion
-2 cloves garlic
-3 thin white eggplant
-5 thin purple eggplant
-1 yellow pepper
-1 green pepper

Mince the garlic. Cut the onion in half, peel the skin off, and cut into Chinese-style wedges. Cut the eggplant into thick disks. Cut the beans into 2-inch-long sticks. Halve and core the peppers, then cut into strips.
Heat oil in the pan from before. Put in the garlic and onions, and sprinkle with salt. When the onions are softened, add the beans and eggplant. Taste test; once the beans are tender but crisp, add the peppers. Cook until slightly softened. You can add soy sauce or whatever here. I didn’t keep track of what I was doing, but I’m pretty sure I didn’t use soy sauce and it turned out really flavorful.
Heat the oven to 200. Turn on the waffle iron. I never really figured out how much batter you need, but just make sure there’s enough to fill up the pattern. Cook four waffles, placing them on a sheet in the oven to keep them warm while the others cook.
Plate a serving of the stir fry, and place the waffle on top. I have a waffle iron that makes 5 hearts so I made a fun arrangement!

Report

Yeah!! Eggplant waffle! It totally worked. The waffle was delicious. It was super great. It also paired well with the stir fry as a starch base. All the stuff in the batter didn’t get in the way at all; the waffles cooked right and everything. While I just planned for the waffle to be cut up and eaten with the stir fry, people tended to use the sections like a taco shell or mu shu wrap. Which was good too, though they didn’t hold so much.
The salad was actually even better. While I was really delighted at the waffle turning out well, the salad was ridiculous. It had a bunch of great stuff in it, so it’s not surprising. I used some of the special honey I bought in the dressing, the figs were incredible, the eggplant had a bite to it but then yielded nicely. So, so good. Creamy and sweet and just a little salty.

I didn’t like the panna cotta. A lot went wrong; I didn’t use full cream, and might have used too much gelatin because of my maybe-not-well-divided gelatin packets. I also didn’t oil the ramekins. So, what I ended up with was rather flavorless milk jello that we couldn’t get out onto a plate. It just didn’t present well.  I wanted to use the pluots somehow, and keep them at least somewhat whole, so panna cotta seemed like a good choice, since its flavor is so subtle. But as you can see, very little of the pluots actually stayed whole. The rest were ground up and enhanced with sugar. I kind of panicked here. It was a decent finish, just because the dairy and cold gelatin sucked up the lingering flavors of the waffle dish, but definitely a disappointment overall.
In the photo of the waffle, there’s little drops of sauce on it. What I wanted to do was make a salty/sweet/spicy “syrup” to pour over the waffle. What happened instead was I used WAY too much soy sauce (in fact I basically made a soy sauce reduction, with some honey [thankfully just Trader Joe’s honey], sriracha and lemon juice) and reduced it too far so it didn’t pour well. I should really have figured this part of the recipe out beforehand. A sweet chili sauce would have been good. The waffle didn’t NEED sauce, but it would have been better. And it would have completed the image to have a little pitcher of syrup! I also would have cooked the waffles a bit longer, because they ended up a little softer than I wanted once they were served.

I loved this one. Despite the failed dessert, the salad and waffle were a one-two punch of really well-executed dishes. Totally awesome. I’m still really pleased about the waffle. Make it!

Next Week: Broccoli